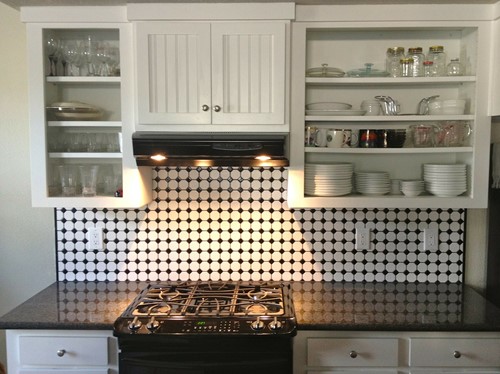
Nothing completes an open floor plan better than open shelving. Open shelves present everything for the world to see. They transform what may be a cluttered, dark, hidden space into one that becomes a place of not only function but of style.
Open shelving complements the Minimalist, Industrial or Scandinavian Modern styles. But depending on how you arrange on those shelves, it can also work with those who love something more cozy like Rural or French Country.
On the other hand, open shelving isn't for everyone. Some prefer the convenience and privacy of tucking items away behind closed doors. They feel less need to continually ensure everything looks beautiful on those shelves. And if you live in an arid climate, doors protect dishes, cans and boxes of pasta from the dust that tends to settle.
Doors vs. shelving? That's the question you'll need to ask yourself before making a change. But if you're ready to transform your cabinets to open shelving, here's how it's done.
Get everything out of the way. That includes removing those doors, which should simply require a screwdriver. Already, you'll begin to see your open shelves taking shape.
You won't need them since you're not replacing the doors. Fill any holes with wood filler. If these look uneven, hand sand them. But paint will cover up most of the imperfection.
A cabinet with more than one door will likely have a piece of wood where the two doors come together. You don't need it. Remove it with a saw and hammer.
If you find any nails or staples left behind, you may need to pry them. But sometimes you'll find they've been driven in too far. If there's nothing that the claws of a hammer can grasp, force the nail back through the wood. It should only take some careful whacks to the sharp side with your hammer.
You choose the color. But why stick with one? Open shelves are the perfect opportunity to add contrast. Try painting the inside a dark color like navy, black, dark gray or red. Then paint the outside a complementing light color, pale gray or white.
Whatever you do, don't forget to seal the paint with a polyacrylic. It reduces the risk of water damage and strengthens the paint so that it's less likely to chip or fade.
Don't place anything on the shelves for at least 48 hours. But once that timer dings, you're ready to assemble. If you have more dishes than you can presentably place on the shelves, ask yourself if you need them. Less is more on open shelving.
We hope you enjoy your new open shelving. To learn more about home maintenance and design, follow our blog.

Whether you're in the research phase at the beginning of your real estate search or you know exactly what you're looking for, you'll benefit from having a real estate professional by your side. I'd be honored to put my real estate experience to work for you. I love helping my clients achieve their ultimate real estate goals. I'm here for you every step of the way!